[
Return to Main Page ] [
Return to Projects Index
] [
Doc's Machine & TWB Store] [
Contact Us ]
[
The Whiteboard Webcomic
]
Upgrading to a 3-Phase motor and VFD:
When I bought it, the Logan had a fractional-HP single-phase motor, that
as I got busier in the shop, eventually proved just a bit too anemic for the
work I needed to do. I tried bumping it up to a 1-1/2HP single phase, which
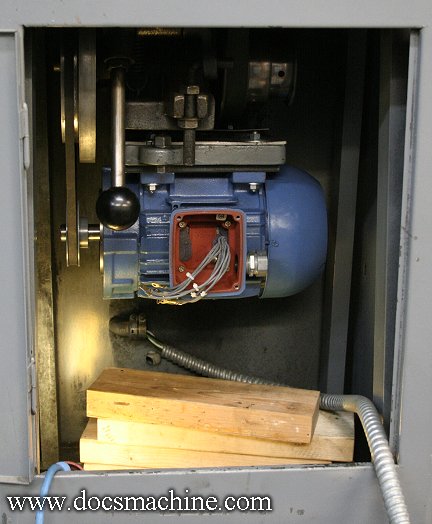
helped, but one day I spotted this brand-new WEG severe-duty 2HP 3-phase
motor on the local Craigslist. It wasn't exactly a "bolt in", but with a few
bits of plate and a couple extra bolts, I got 'er mounted in there.
After that, I ordered up a new VFD and while waiting for it to arrive, sketched up an idea
for a quick mounting bracket. Using my at-the-time-new-to-me Nichols horizontal mill,
I whipped up a set of saddle clamps out of aluminum bar stock.
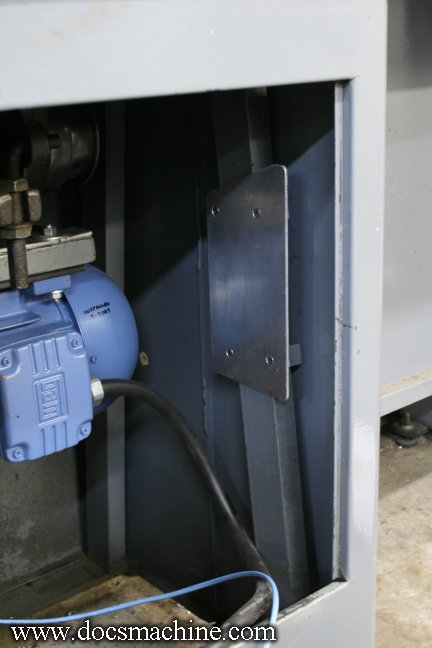
Those clamps and a chunk of sheet aluminum assembled like so,
to form the beginning of a mount for the VFD. I preferred the
"clamping" arrangement like this rather than either drilling and tapping,
or welding to the structure of the stand inside the lathe cabinet.
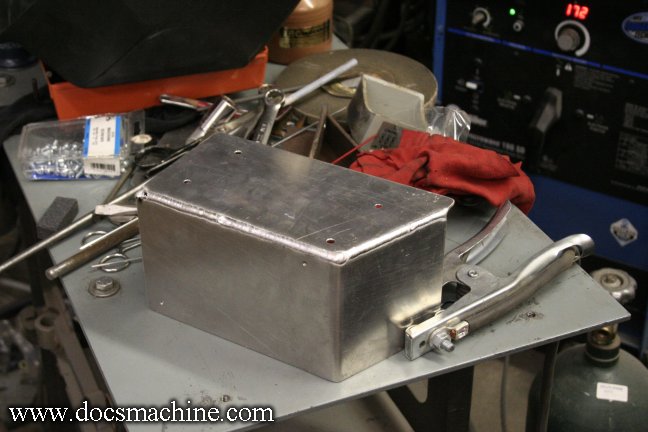
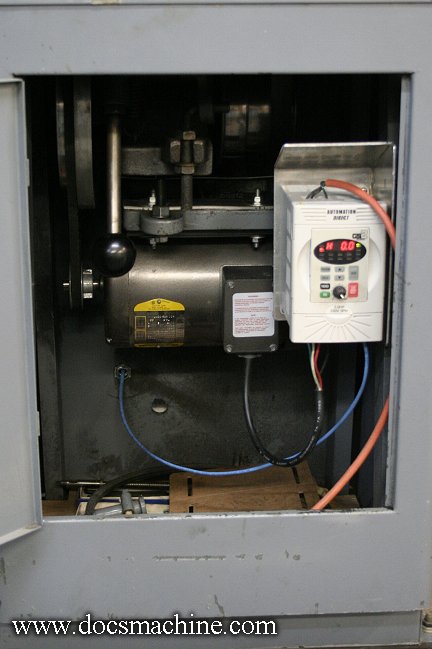
The mounting panel was than enclosed into a 3-sided box

Fairly simple looking thing, but effective.
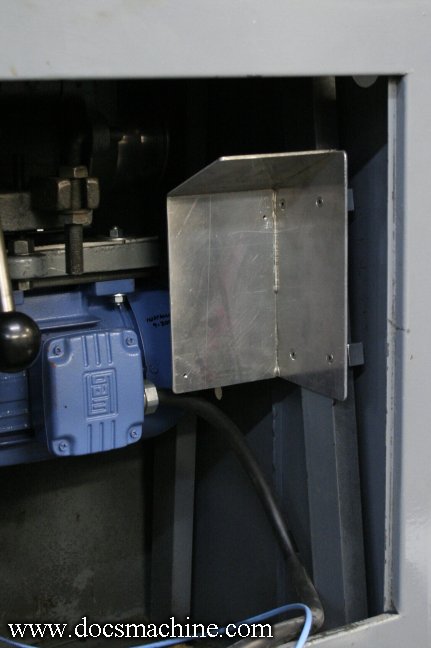
That 'box' mounts like so inside the cabinet, and turns the VFD toward
the front for easier access to the controls and view of the display. The
box also acts as a moderate heat sink, and protects the VFD from
any gunk or dust that might be slung off the belt or pulley system.
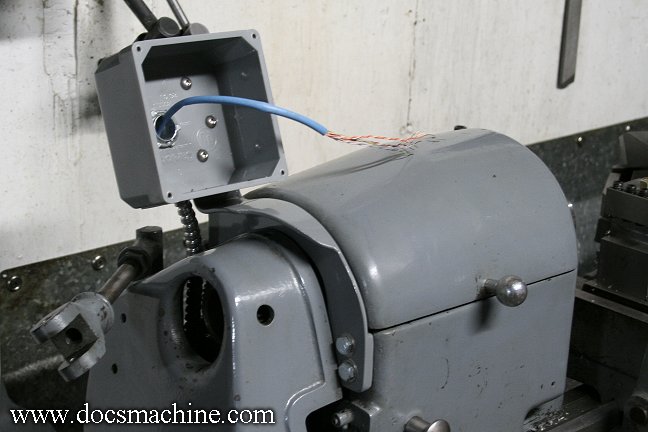
For controls, I welded up this almost-factory-looking mount which used existing bolt holes in the
headstock, and used that to mount a "blank" weatherproof PVC junction box from Home Depot.
Since the controls are all low-voltage signals, I ran some CAT-5 through some stainless
flexible conduit down the back of the cabinet and over to the VFD.
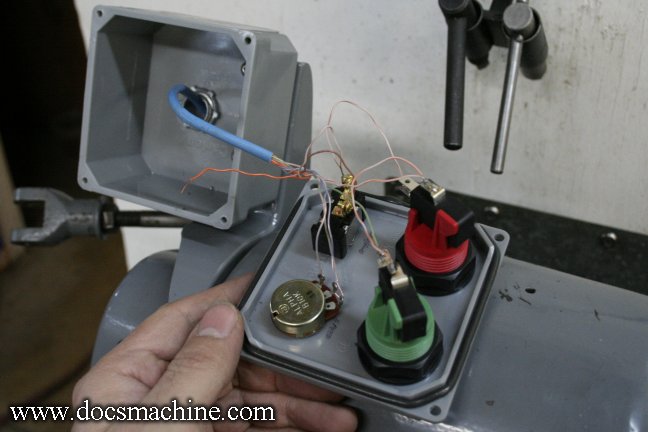
A bit messy, but this was during the testing phase. But, it all worked, and I neatened it up a bit afterward.
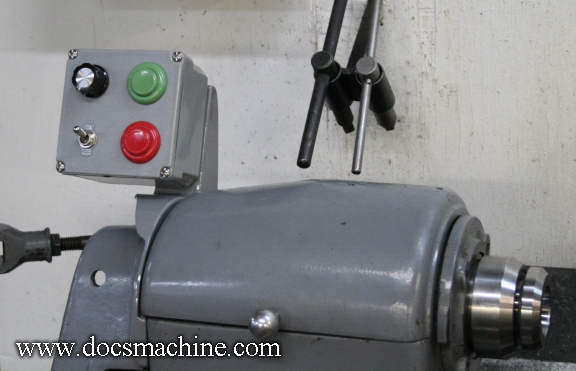
Buttoned up- so to speak- and ready to use.
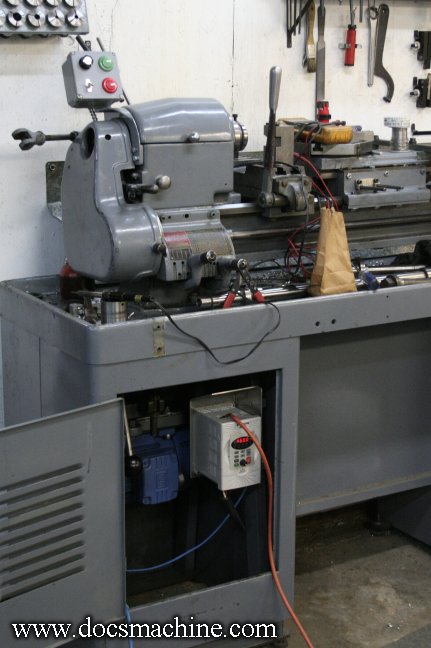
And it's just that easy. An Automationdirect VFD mounted down and
out of the way, and a set of easy to use, mostly gunk-proof controls
right where they're easy to reach and easy to use. The buttons are
typical arcade console fare, the black knob is the speed control,
and the switch is for forward or reverse.
Not long afterward, I decided I needed to increase my top spindle speeds, so
I swapped out the WEG 1725 RPM motor for a 2HP Baldor 3450 RPM unit,
which doubled the spindle speed and made the machine quite a bit more useful.
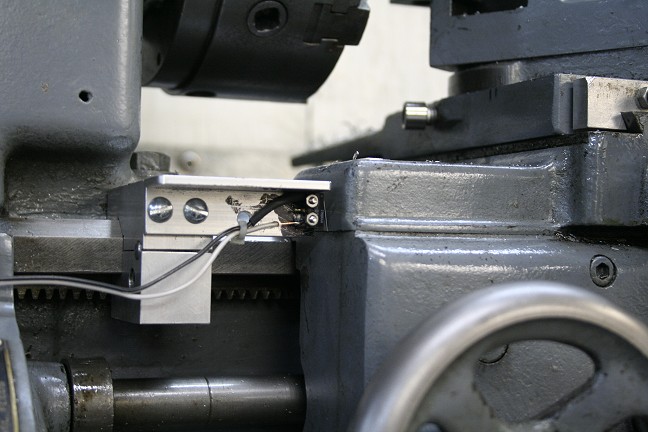
And, with the VFD, I was able to whip this up for a particular run of parts. It's basically a remote "stop" switch
or effectively an electric carriage stop. I had a lot of parts to bore very slightly, and were deep enough I had
to have a long and chattery boring bar. To prevent chatter, I ran them very slowly, so with this stop, I was
able to set the machine cutting, and then step away to do other work. The switch would stop the
machine when the boring bar was through, after which I'd simply reset the job and do the next part.
All text, photos and graphics
Copyright 1998- 2017, Doc's Machine & Airsmith Services. All Rights
Reserved.
Information contained in
these pages is for reference and entertainment
purposes only. Our methods are not always the best,
quickest, safest, or even the correct ones. It's up to you to know how
to use your own machines and tools.
Keep your fingers away from the spinny blades o' death and you should
be all right.


