
[ Return to Main Page ] [ Return to Projects Index
] [Doc's Machine & TWB Store] [ Contact Us ]
[ The Whiteboard Webcomic
]
Modding the Chinese K40 Laser Engraver, Part 2:
Reading other K40 builds and watching various YouTube videos provides a short list of basic mods to go along
with some of the setup steps you need to do on these. One trick helpfully provided by a Guild regular was to add
grommets to the water lines leading to the laser tube. As supplied, they're just threaded through punched holes,
which could eventually wear through the tubes and cause a leak.
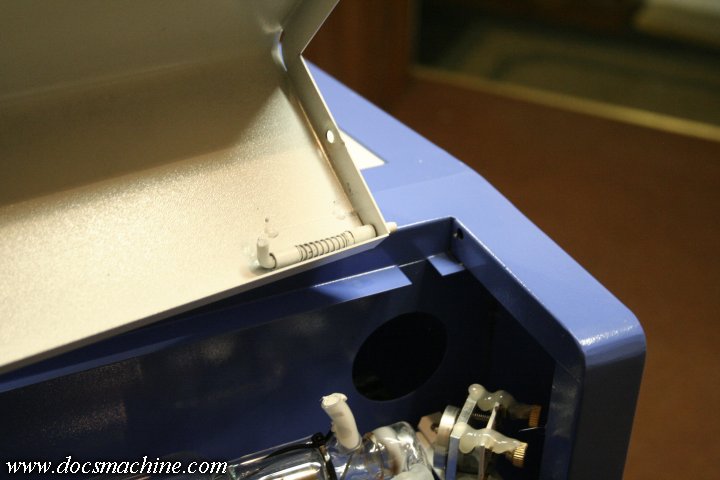
To do this, you need to work in the laser tube compartment- the lid isn't designed to stay open, but is provided
with these spring-loaded hinge pins so the lid can be removed entirely.
After that, the job is easy: carefully slide the hoses out of the holes in the chassis, add some grommets to the holes
(1/2" groove OD, 3/8" ID grommets) and just slide the hoses back into place. The trickiest part is to get the hoses
from the inner holes out through the holes in the rear bulkhead- I have large hands but was still able to reach in
there through the exhaust port opening seen to the right.
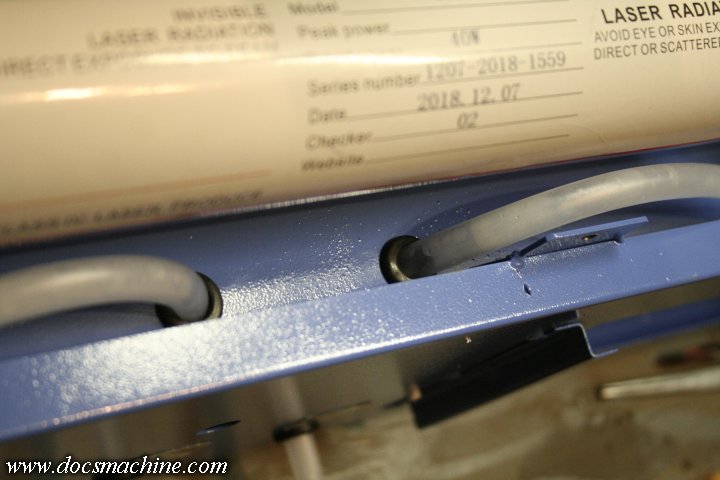
Once both the inner and outer grommets are in, keep a little slack on the hoses, don't try and draw them up tight
else you could kink them.
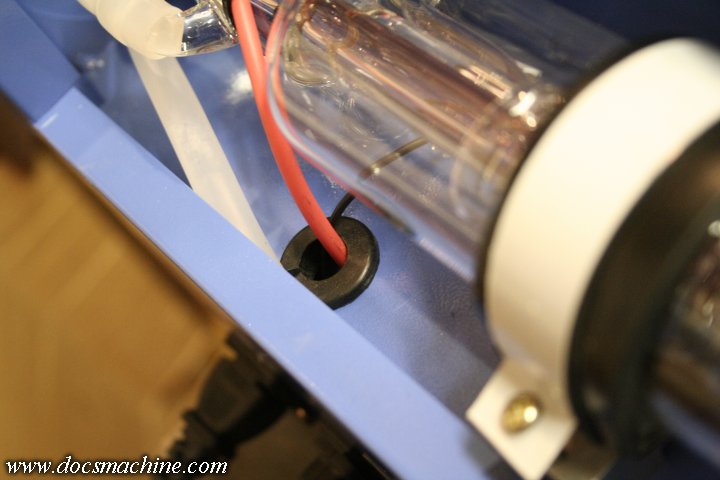
It also can't hurt to put a grommet in the hole the HV leads come through. For this one, you'll need to slice a
larger 5/8" grommet and work it around the wires, as it's kind of difficult to actually disconnect the leads.
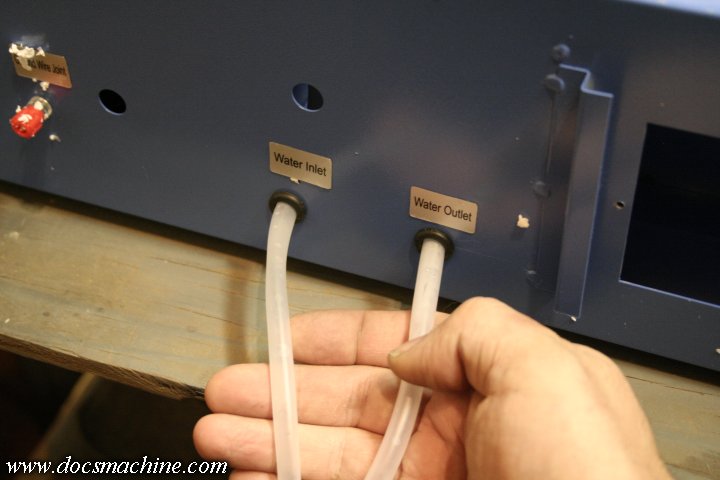
Another common, "quick and dirty" startup step is to simply use a bucket with the supplied water pump to
provide cooling. This isn't always a permanent fix, as extended cutting, I'm told, can heat up a small bucket,
but it's my understanding that most common brief uses of the machine don't appreciably warm the water.
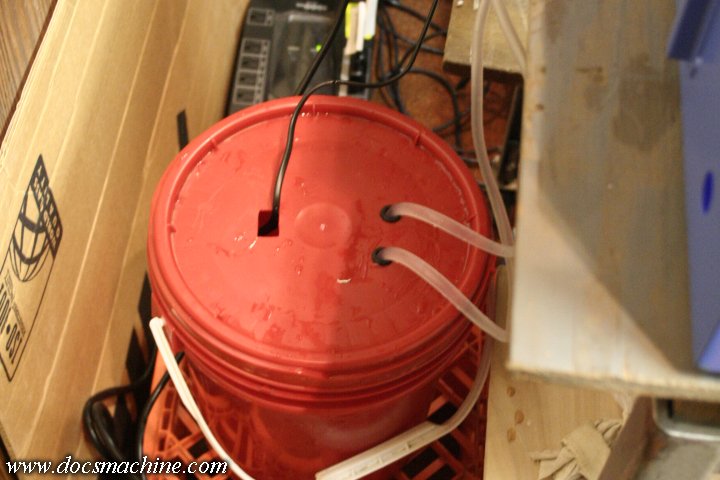
In my case, I used a small 2-gallon bucket, mainly because it had a fairly secure screw-on lid. I drilled two
1/2" holes in the lid and used two more grommets to pass the hoses through. The pump is submersible and
simply stuck to the bottom of the bucket by its suction-cup feet. I then just used an eXacto to cut a hole in
the lid for the power cord and plug.
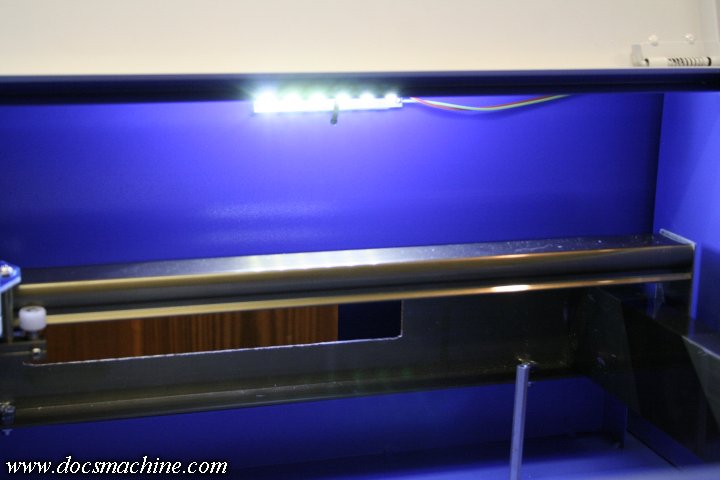
Once I vertified the coolant was flowing, I powered up the machine, and was pleasantly surprised to see it
already included a common upgrade that I had seen other users install- a strip of bright LED lights inside the
cutting compartment to make it easier to see what's going on.
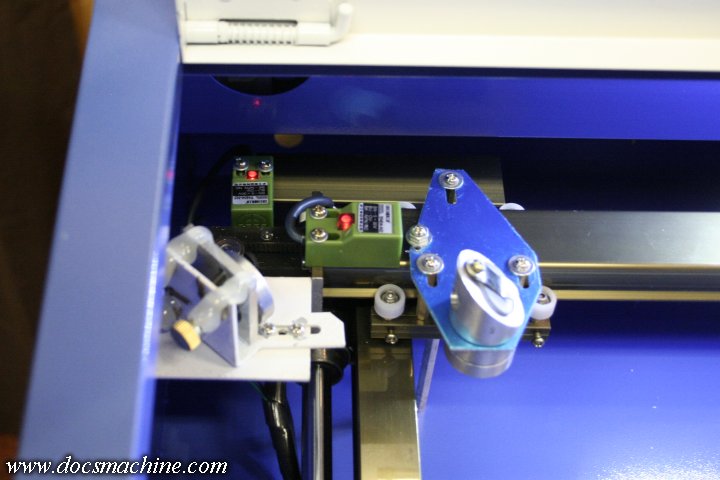
Also once powered on, the cutting head "homed" as it's supposed to. So far, so good...
Modding the Chinese K40 Laser Engraver, Part 2:
Reading other K40 builds and watching various YouTube videos provides a short list of basic mods to go along
with some of the setup steps you need to do on these. One trick helpfully provided by a Guild regular was to add
grommets to the water lines leading to the laser tube. As supplied, they're just threaded through punched holes,
which could eventually wear through the tubes and cause a leak.
To do this, you need to work in the laser tube compartment- the lid isn't designed to stay open, but is provided
with these spring-loaded hinge pins so the lid can be removed entirely.
After that, the job is easy: carefully slide the hoses out of the holes in the chassis, add some grommets to the holes
(1/2" groove OD, 3/8" ID grommets) and just slide the hoses back into place. The trickiest part is to get the hoses
from the inner holes out through the holes in the rear bulkhead- I have large hands but was still able to reach in
there through the exhaust port opening seen to the right.
Once both the inner and outer grommets are in, keep a little slack on the hoses, don't try and draw them up tight
else you could kink them.
It also can't hurt to put a grommet in the hole the HV leads come through. For this one, you'll need to slice a
larger 5/8" grommet and work it around the wires, as it's kind of difficult to actually disconnect the leads.
Another common, "quick and dirty" startup step is to simply use a bucket with the supplied water pump to
provide cooling. This isn't always a permanent fix, as extended cutting, I'm told, can heat up a small bucket,
but it's my understanding that most common brief uses of the machine don't appreciably warm the water.
In my case, I used a small 2-gallon bucket, mainly because it had a fairly secure screw-on lid. I drilled two
1/2" holes in the lid and used two more grommets to pass the hoses through. The pump is submersible and
simply stuck to the bottom of the bucket by its suction-cup feet. I then just used an eXacto to cut a hole in
the lid for the power cord and plug.
Once I vertified the coolant was flowing, I powered up the machine, and was pleasantly surprised to see it
already included a common upgrade that I had seen other users install- a strip of bright LED lights inside the
cutting compartment to make it easier to see what's going on.
Also once powered on, the cutting head "homed" as it's supposed to. So far, so good...
 |
 |
 |
All text, photos and graphics Copyright 1998- 2019, Doc's Machine & Airsmith Services. All Rights Reserved.
Information contained in these pages is for reference and entertainment purposes only. Our methods are not always the best,
quickest, safest, or even the correct ones. It's up to you to know how to use your own machines and tools.
Keep your fingers away from the spinny blades o' death and you should be all right.