[
Return to Main Page ] [
Return to Projects Index
] [
Doc's Machine & TWB Store] [
Contact Us ]
[
The Whiteboard Webcomic
]
Warping the Feed on a Double Automag, Part 1:

For this mod, a customer was building a "Double Automag", ot two 'Mags set side-by-side, actuated by
a single grip frame. And for this build, he wanted to "Warp Feed" each side, and wanted a cleaner look
than the usual "power feed fed from the bottom" method.
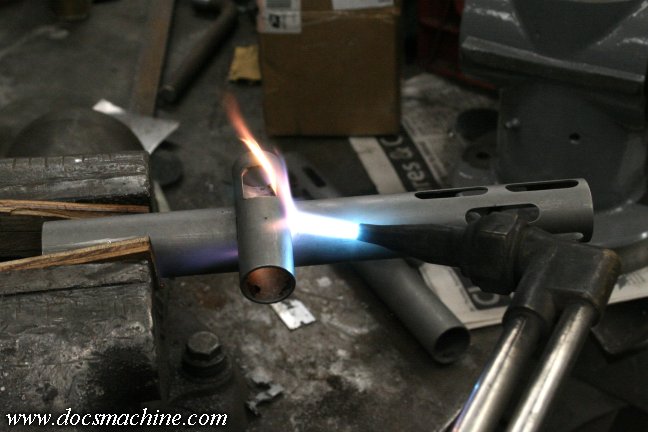
So I started by removing the original power feed necks- rather than cutting or milling them off, I simply
used an acetylene torch to soften the braze and popped them off that way.
Easy and quick, with no damage to the bodies or necks. The latter is important
as we'll be reusing parts of the feed necks during the modification.
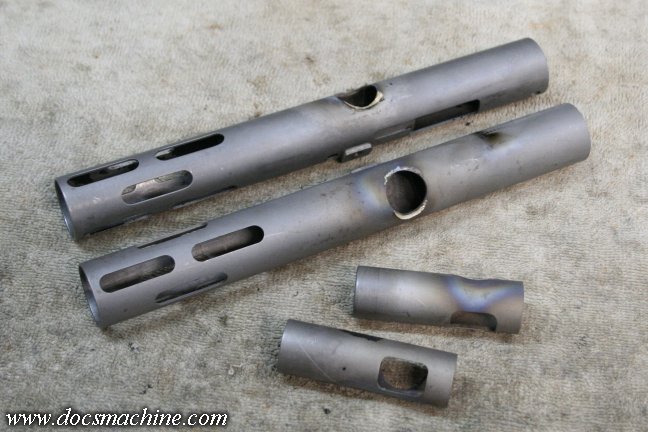
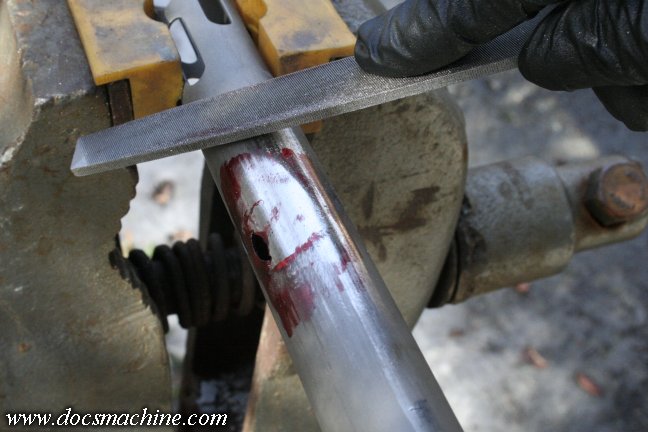
The trouble with the stainless steel Automag body is that it's very tough to sand or file smooth. So one needs
to be very careful not to mark or gouge the body at any stage, as nicks are nigh-impossible to sand out.
Because of this, I carefully filed the remnants of the factory braze off, making sure to get it down to bare
stainless where the braze was, so it won't interfere with the welding later.
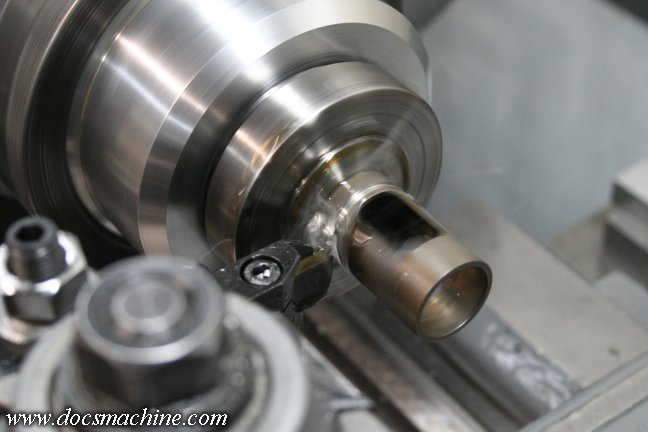
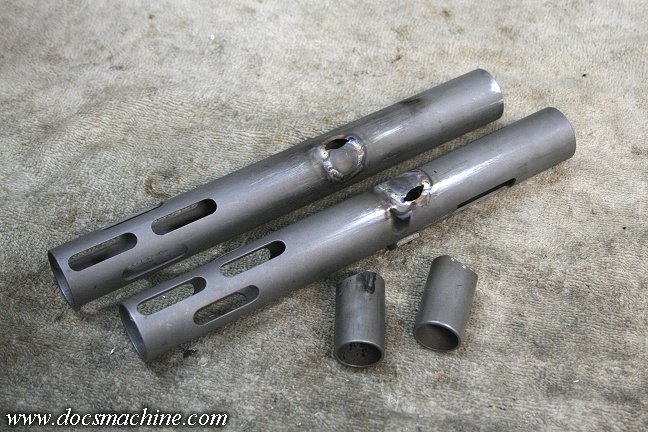
With the bodies done, I took the necks and sliced off the feed-port/window section, and faced them to length.
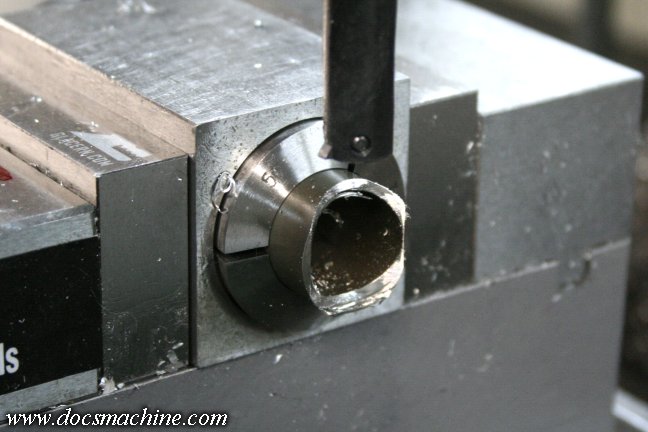
Then, using a boring head so I could get the radius exactly right to match the body,
I milled a shallow "fishmouth" in the end of each neck.
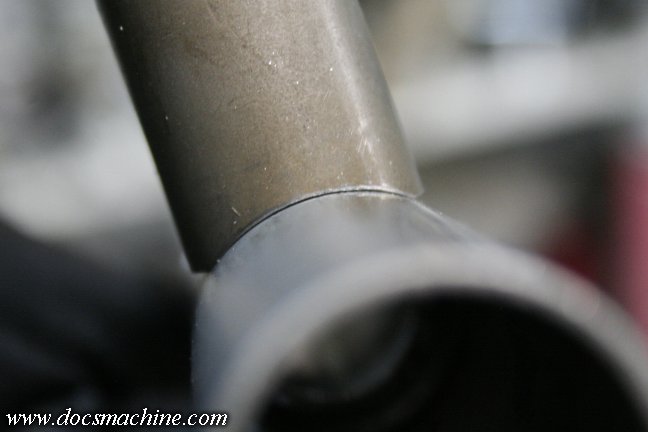
That's the kind of fit we're going for. No gaps, no high points.
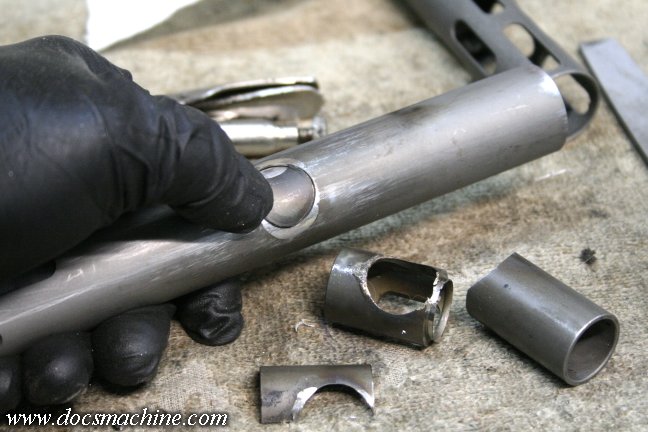
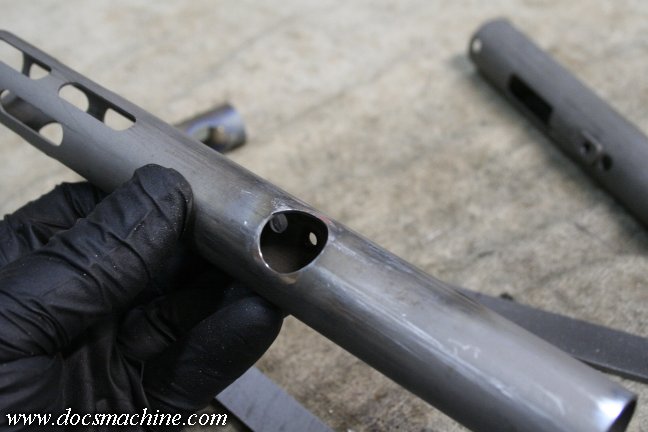
The parted-off section of the feed necks also served a purpose- I sectioned those and carefully trimmed
them to create blanks to fill in the original feed holes in the bodies. We'll be "rotating" the feed hole
45° down the body, so at least the top half needs to be filled in and smoothed.
An aluminum slug inside helps hold the filler piece in place.
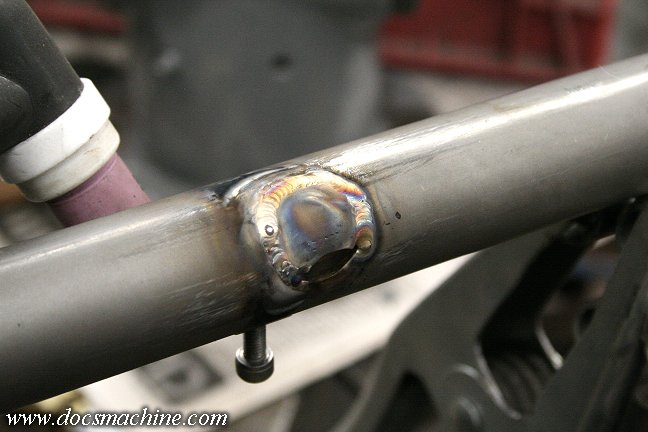
Then, with a little care and some 1/16" tungsten, each filler piece is carefully TIGged into place
And done. The welding, no matter how carefully you do it, almost always distorts the bodies. So when
I started doing these mods, I built a fixture to help straighten them using a press.
After that comes the tedious part- very carefully grinding and hand-filing the 'plug' and welds back to
flat and level with the rest of the body. This definitely calls for patience, a selection of sharp files,
a good file card, a lot of patence, and a back brace. :)
All text, photos and graphics
Copyright 1998- 2018, Doc's Machine & Airsmith Services. All Rights
Reserved.
Information contained in
these pages is for reference and entertainment
purposes only. Our methods are not always the best,
quickest, safest, or even the correct ones. It's up to you to know how
to use your own machines and tools.
Keep your fingers away from the spinny blades o' death and you should
be all right.


