[
Return to Main Page ] [
Return to Projects Index
] [
Doc's Machine & TWB Store] [
Contact Us ]
[
The Whiteboard Webcomic
]
Building- slowly- a Classic KMG-Style 2" x 72" Belt Grinder, Part 1:
In late 2008, I decided to add a popular KMG-style 2" x 72" belt grinder to my shop. They're extremely handy,
but expensive, so various people have banded together and produced a set of DIY plans so that the average Joe
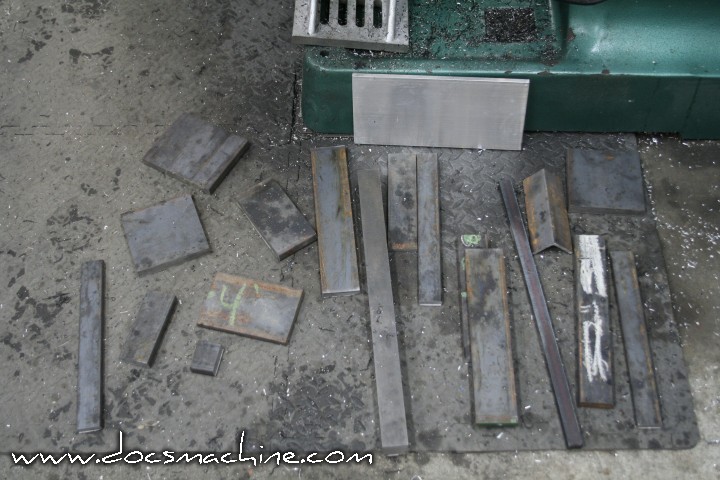
could build his own. I downloaded the plans, and took the list of required steel pieces over to my local supplier
and had them cut me the appropriate pieces. Cost me about $128, as I recall.
Other work and customer demands forced me to set it aside, where I would get to it later. :)
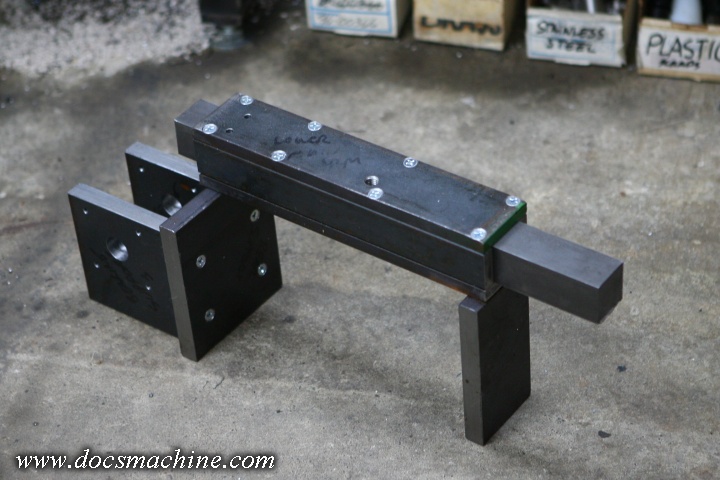
By August of 2010, I'd at some point found the time to assemble the main framework of the grinder...
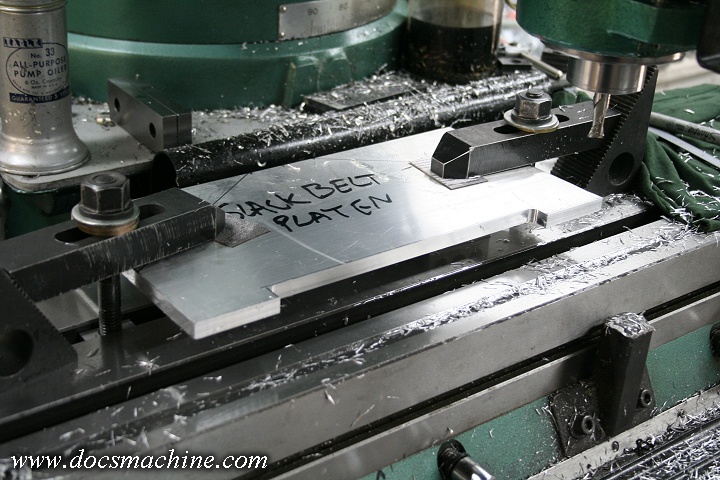
And about a month later, took the time to mill out the slack belt platen.
And then set it all aside again. :)
In November of 2011, already three years after I started this project, I'd found a suitable motor
but needed a pulley, as t
he motor has an "industrial" sized output shaft of 7/8". The
pulleys are
commonly available in 5/8", 3/4" and occasionally 1".
They're intended, really, for fractional-HP
motors.
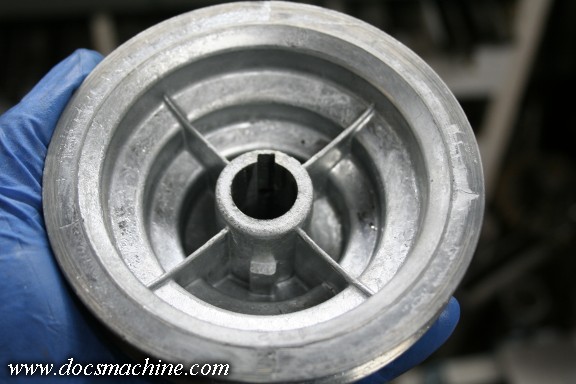
I could find plenty of 7/8" pulleys, but no cone pulleys, or at least,
not the right sizes or
groove counts. I also couldn't mod one of the
potmetal ones, because there wasn't enough meat.
 After idly looking for a while (occasionally checking eBay,
looking through McMaster or MSC
After idly looking for a while (occasionally checking eBay,
looking through McMaster or MSC
whenever I was placing an order, etc.) I
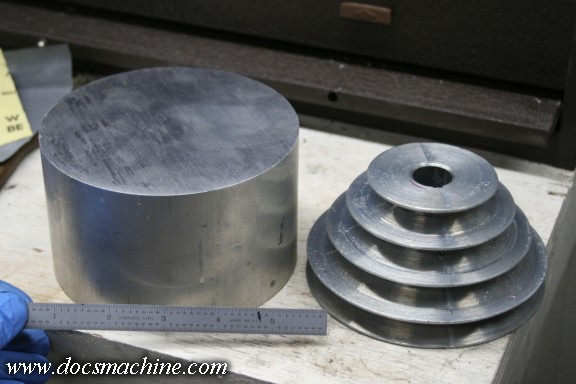
decided it was time to make one. The local metal
suppliers don't carry aluminum round over 3", so I found
an appropriately-sized chunk
on eBay for something like $35.
 The rest is a fairly simple turning exercise...
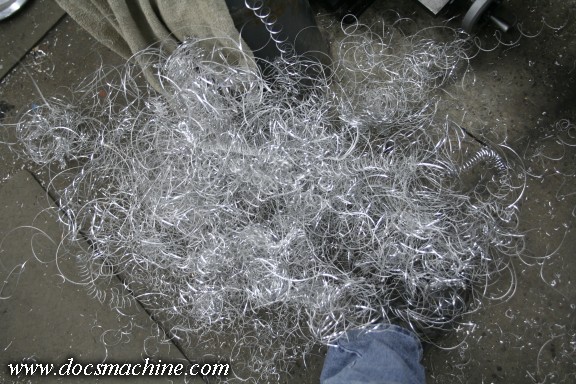 ... which produced huge piles of swarf.
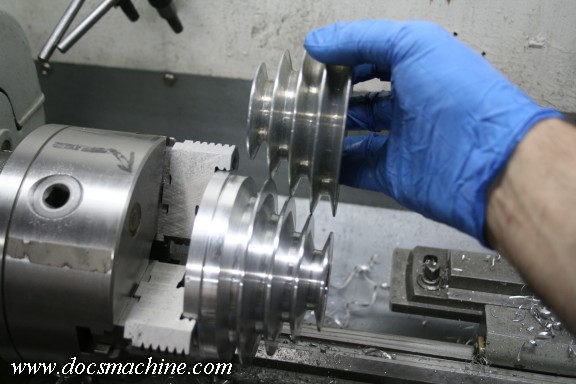
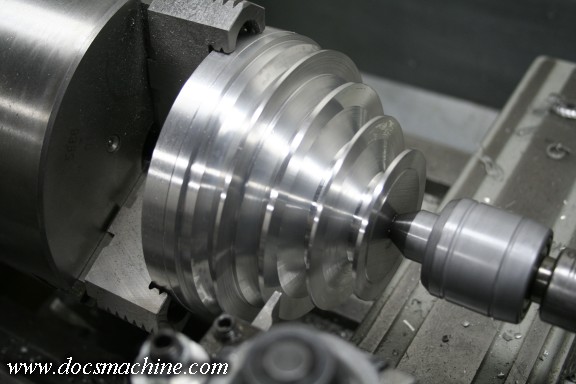 More boring than interesting; I had a physical sample to take my
measurements from, cutting V-belt
More boring than interesting; I had a physical sample to take my
measurements from, cutting V-belt
grooves is a fairly simple exercise
for the compound, and none of it needs to be terribly precise.
(The cast
original is wildly out of round, by .010" to .020" in places.)
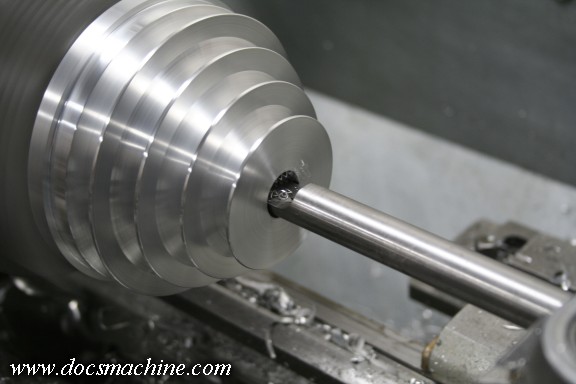 Drill and bore to size...
 ... Check against the original...
 ... And turn off the excess. (I couldn't have the coin cut to
size, so I bought what
... And turn off the excess. (I couldn't have the coin cut to
size, so I bought what
was closest. It gave me meat to grab with the
chuck, though.)
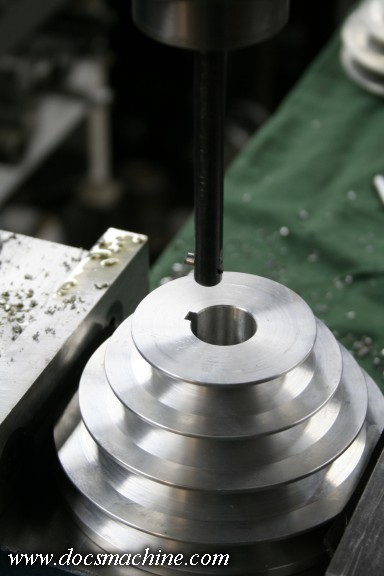 The only tricky part was broaching the keyway. I had access to a proper
DuMont broach set, but the 3/16" one was broken. The fallback was the
old boring bar trick- a special cutter, left over from the last time I keyed
something in an old boring bar, and chucked in the mill spindle.
Lock the
spindle brake so it can't rotate, and without turning it on,
use the
quill as a broach press.
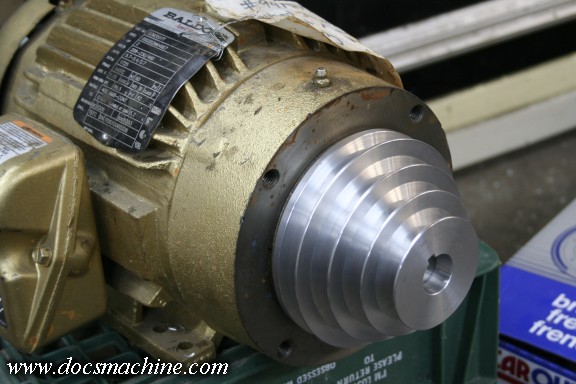 After that, it was a simple matter of drilling and tapping the
bottom of the second groove for a
After that, it was a simple matter of drilling and tapping the
bottom of the second groove for a
1/4"-20 setscrew, cutting a chunk of
key, and assembling it to the motor. The motor, by the way,
is a brand new 2HP TEFC 220V 3-phase Baldor
that the local oil refinery was going to throw in the
trash because it
was the wrong voltage. I was, of course, more than happy to put it to
good use.
Still have to make a few more parts before the grinder's done- but it's slowly getting there.
:)
All text, photos and graphics
Copyright 1998- 2018, Doc's Machine & Airsmith Services. All Rights
Reserved.
Information contained in
these pages is for reference and entertainment
purposes only. Our methods are not always the best,
quickest, safest, or even the correct ones. It's up to you to know how
to use your own machines and tools.
Keep your fingers away from the spinny blades o' death and you should
be all right.


